Design Services

Container Shelter Assembly: A Step-by-Step Guide
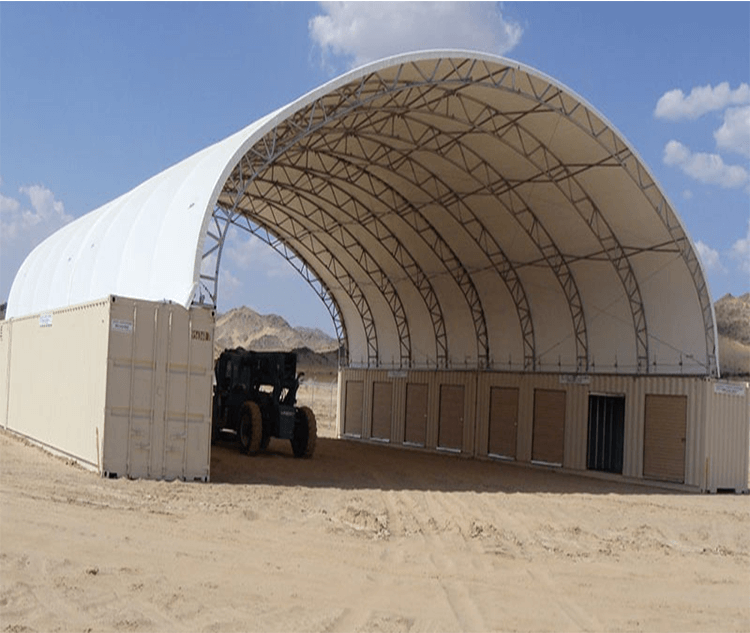
Container shelters, also known as container dome shelters, are versatile structures used for storage, workshops, or temporary housing. They are popular for their durability, affordability, and ease of assembly. This guide will walk you through the process of assembling a container shelter.
1. Planning and Preparation
Before starting the assembly, careful planning is essential to ensure the shelter meets your needs.
- 1. Site Selection and Preparation
- Choose a flat and stable area for your shelter. Clear any debris and level the ground to provide a solid foundation. If needed, install a concrete base or other supportive materials to enhance stability.
- 2. Permits and Regulations
- Check local building codes to determine if you need permits for the shelter. Compliance with safety and zoning regulations is crucial.
- 3. Tools and Equipment
- Prepare the necessary tools, including:
- Wrenches
- Ladders or scaffolding
- Power drills
- Measuring tape
- Safety gear (gloves, helmets, goggles)
- 4. Inspect Components
- Verify that all components of the container shelter kit, such as frames, bolts, covers, and connectors, are present and undamaged.
2. Assembly Steps
- Step 1: Position the Containers
- If using shipping containers as the base, ensure they are properly placed and leveled. These containers serve as anchor points for the structure. Secure them in place to prevent shifting during and after assembly.
- Step 2: Assemble the Frame
- 1. Identify and Layout Components: Unpack and organize the frame pieces according to the instruction manual.
- 2. Erect Arch Frames: Begin by assembling the arch frames on the ground. Connect sections securely with bolts and connectors.
- 3. Lift the Frames: Use manpower or lifting equipment to position the frames onto the containers. Secure them in place.
- Step 3: Install Braces and Supports
- Attach horizontal braces and tension wires to stabilize the frame. These components are critical for ensuring the shelter withstands wind and weather.
- Step 4: Attach the Cover
- 1. Unfold the Cover: Spread out the fabric cover on the ground to check for defects.
- 2. Secure to the Frame: Start by attaching the cover at one end and gradually pull it over the frame. Tighten the cover using straps or ropes, ensuring it is evenly stretched to avoid sagging.
- 3. Fix to the Containers: Secure the bottom edges of the cover to the containers using clamps or bolts.
3. Safety Tips
- Work in teams to handle heavy materials safely.
- Use harnesses and fall protection when working at heights.
- Double-check all connections and fastenings to ensure the shelter is sturdy.
4. Maintenance and Care
- Regular maintenance can extend the lifespan of your container shelter:
- Inspect the frame and cover periodically for wear and tear.
- Tighten bolts and fasteners as needed.
- Clean the fabric cover to prevent mold and dirt buildup.
Assembling a container shelter is a manageable project when approached with proper planning and tools. These structures provide a practical solution for various needs, combining the portability of a container with the protection of a durable cover. By following this guide, you can efficiently set up a shelter that will serve you for years to come.
